Acquisition
QR campaigns & intro sessions
A poster in the stairwell, a flyer at the café, a stand at an expo: under QR campaigns in the sidebar you generate a dedicated QR code for each of those spots. Whoever scans it lands with you — and afterwards you can see which spot actually paid off.
The three campaign types
- Intro session — Leads to your own intro-session page. There's nothing to set up for this — the page is generated automatically from your profile.
- General landing page — Leads to an address of your choice — your website, say, or your Instagram profile. The target URL is required here, because the code would lead nowhere without it.
- Special offer — Same idea, meant for one specific promotion — a page for a summer package, for example. The target URL is required here too.
For a start, Intro session is the right type: it's the only one where TrainerFoundry also supplies the landing page, and a scan can actually become a lead. For the other two, you're only redirecting — what happens afterwards is outside the app.
Creating a campaign
Create campaign opens a short form. Only the campaign name is required — pick one you'll recognise the spot from later ("Surf club flyer" beats "Campaign 3").
On top of that come a description, the type, and an optional start and expiry date. For the Intro session type, the Target URL field isn't shown at all — an info note takes its place, explaining that the redirect goes automatically to your own page. For the other two types the field is required — the form won't save without it, since the code would otherwise lead to an address that doesn't exist.
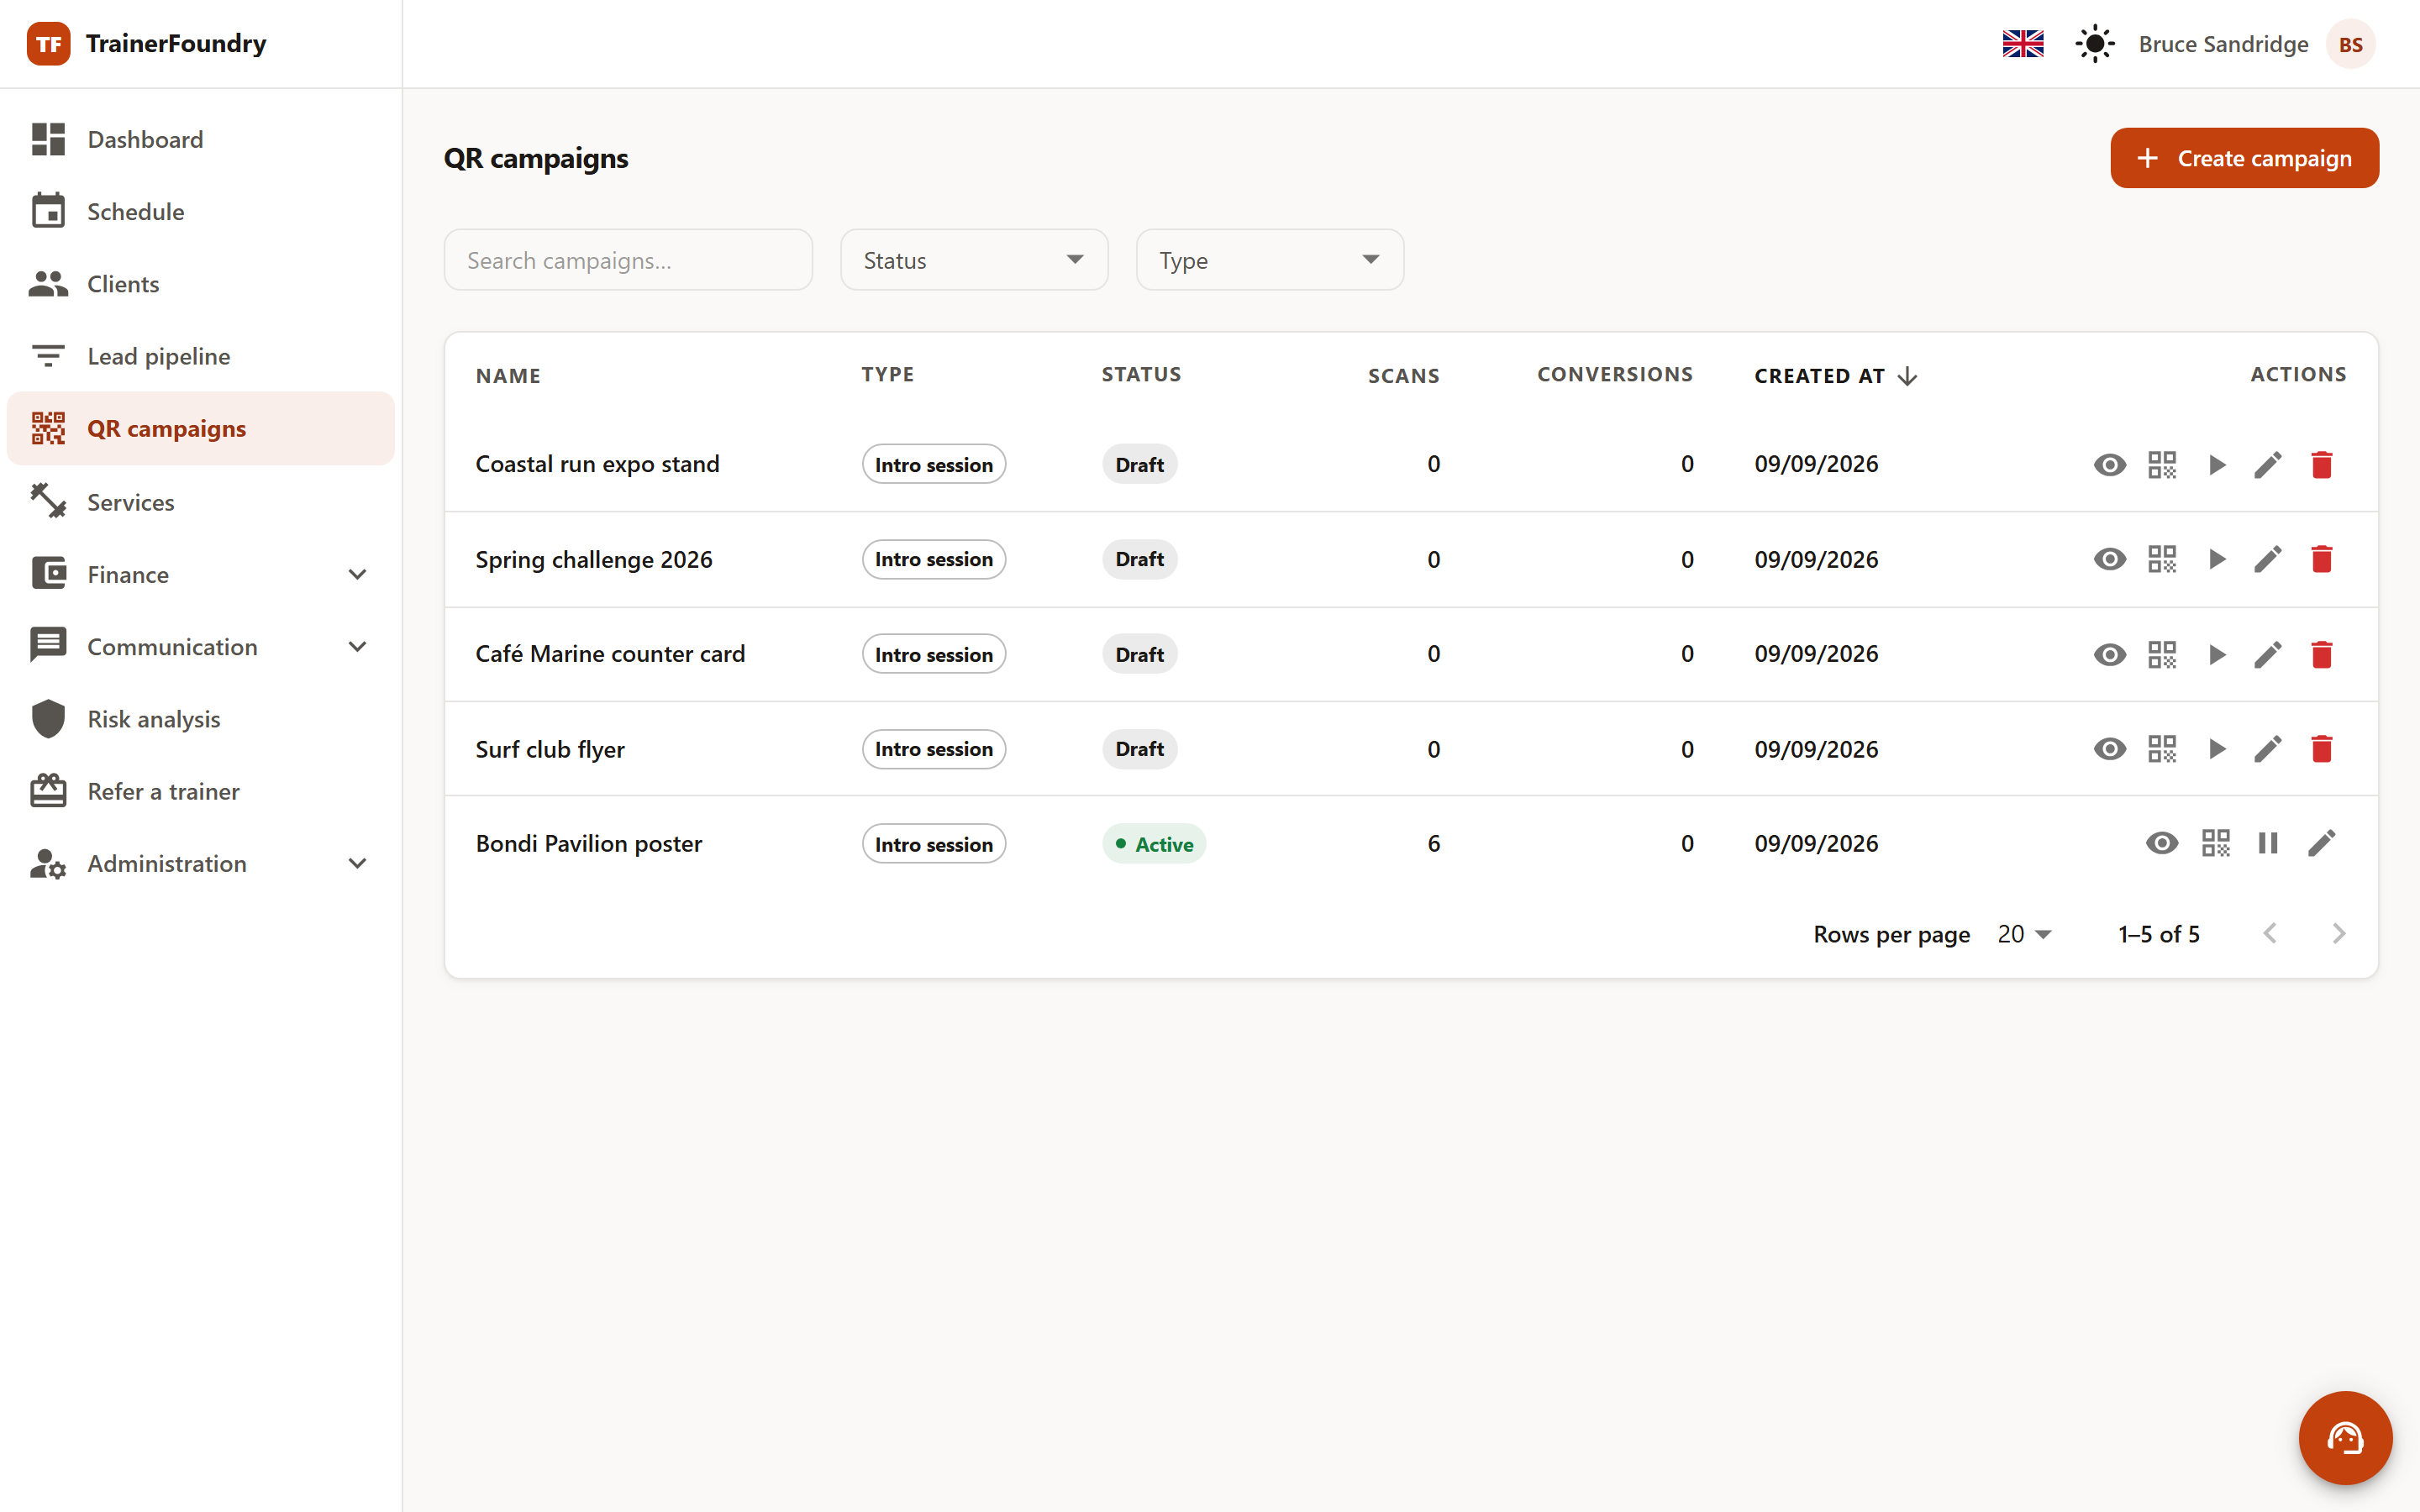
A new campaign starts as a Draft. Only clicking Activate arms its code.
The four statuses
- Draft — Created, but not live yet. The code leads nowhere — deliberate, while the posters aren't up yet.
- Active — The code works and counts scans.
- Paused — Temporarily switched off, without losing the campaign or its figures.
- Expired — Detected automatically for an Active campaign once its expiry date is reached — the next time you load the list, the status already reads Expired, no manual switch needed. A scan after that date gets a "gone" response either way. Once reached, Expired is terminal.
What a scan experiences outside of Active is deliberately unremarkable: a draft, a paused campaign and one whose start date hasn't arrived yet all behave like an unknown address. An expired one reports that the page no longer exists. So a leftover old flyer gives nothing away about your current campaigns — and your figures stay clean, because scans like that are never counted in the first place.
A campaign can only be deleted while it's a Draft. Anything that was once active gets paused instead, so the scans it collected don't disappear — and once an Active campaign's own expiry date is reached, its status flips to Expired on its own, as covered above.
Generating the QR code
Every campaign has its own public address with a short code. The QR action on its row turns that into the code you can put up.
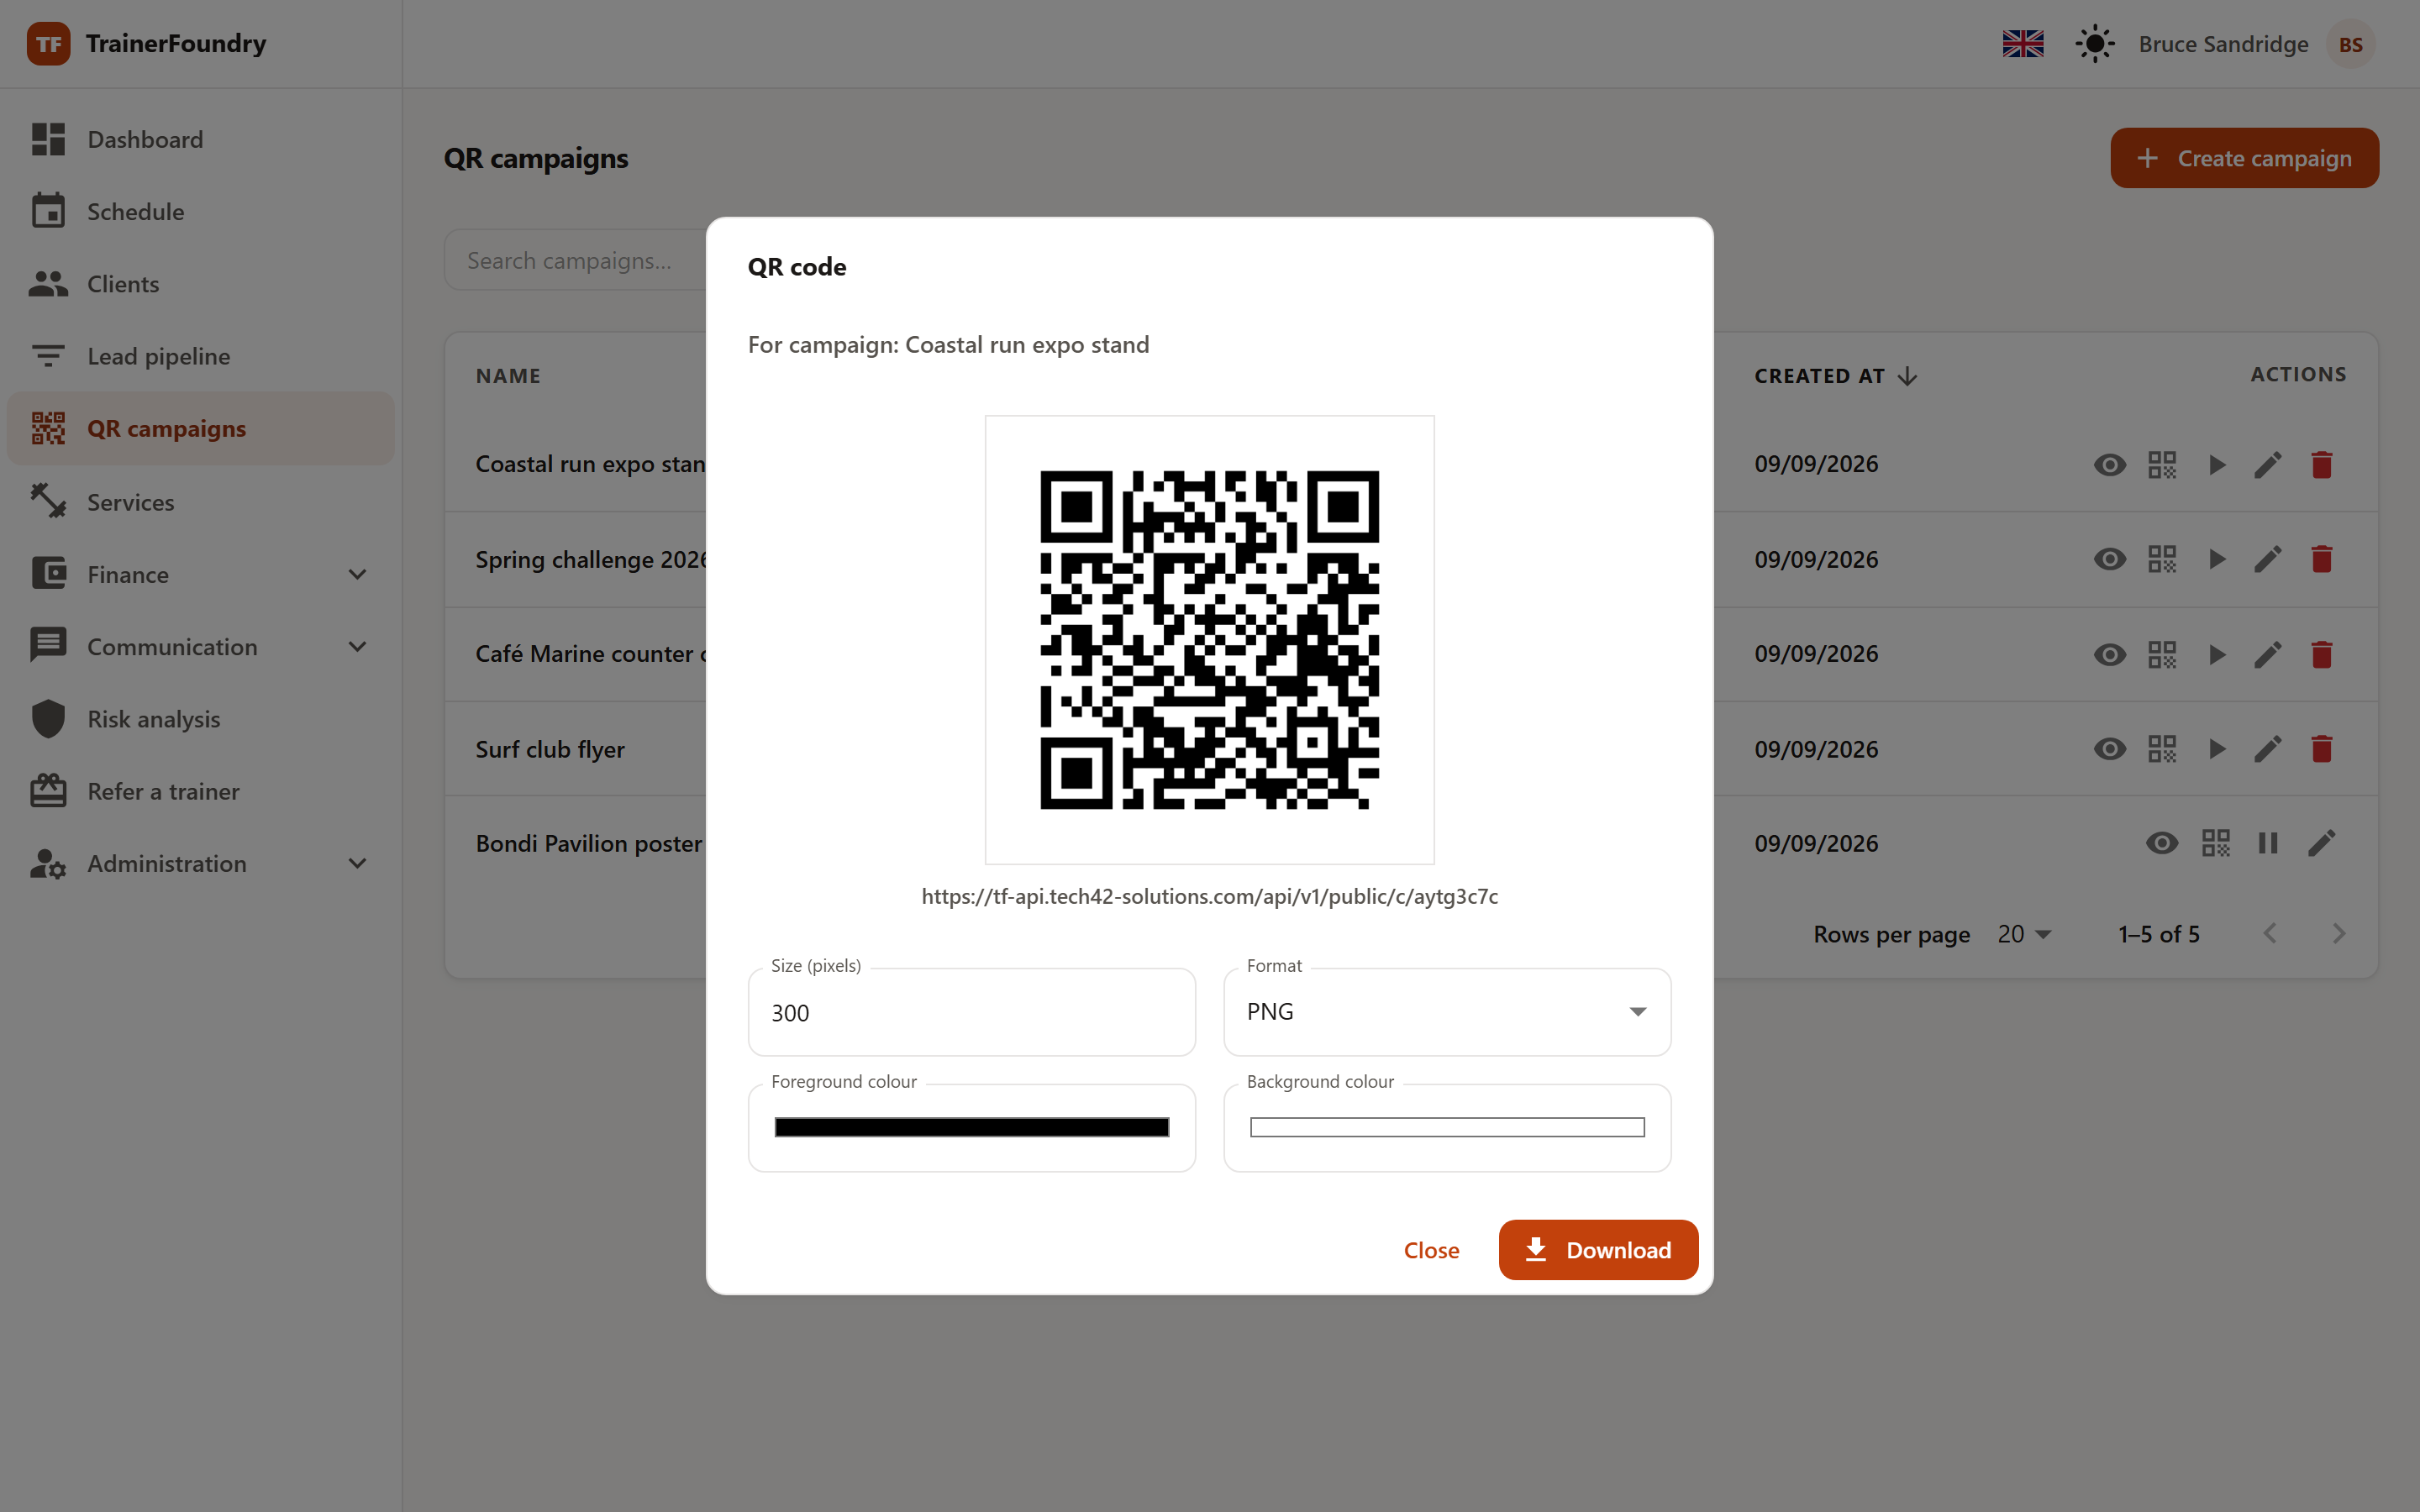
You can set the size in pixels, the format, and the foreground and background colour. Two practical tips: for print, use the vector format — it stays sharp at any size — and keep the contrast high; a pale grey code on a white background looks elegant and is unreadable by any phone camera.
The code is freshly generated from the campaign's address every time. You can re-download it as often as you like, at any size — it's always the same code, and a poster you've already printed never becomes invalid because of it.
The intro-session page
When someone scans the code from an Intro session campaign, your public page opens: your profile up top, with your image and introduction, plus the intro session itself — its title, description, 30 minutes and free of charge are fixed product defaults, not something you customise. The page's colour and cover image come from Settings → Profile ("Brand colour" and "Cover image URL"). Below that, a short form with first name, last name, email, optional phone and a message to you, plus a checkbox for the person to opt in to further updates and offers by email.
Deliberately with no time picker: the person only leaves their details and gets the confirmation "Your trainer will contact you shortly." Under the form is also a short notice about how the data is used — a contact who isn't yet a client still needs to know that up front. You arrange the actual appointment afterwards, in person. That lowers the barrier at the poster — nobody has to flip through a calendar standing in front of the café — and you keep control over who you see and when.
The enquiry lands as a new lead in your lead pipeline, in the New column and with the source QR campaign — attributed to the exact campaign whose code was scanned. If someone opens the same page directly, without scanning a code first, the source shows as Website.
A left-over message is attached to the lead as a note — so you'll see it in the activities list when you call back.
If someone gets in touch a second time using the same email address, this does not create a second lead: the existing one is updated, and its stage is never reset. Someone already sitting at "Intro scheduled" who fills in the form again doesn't fall back to "New".
Analytics
A campaign's detail view shows its figures:
- Total scans — every single visit, even if the same person scans it three times.
- Unique scans — how many different network addresses that was (the scan's IP address, stored hashed). It's the more interesting of the two figures, but it isn't a device or a person count: three phones on the same café Wi-Fi count as one address, while a single phone switching between mobile data and Wi-Fi counts as two.
On top of that there's the Scan trend, with a Period selector for daily, weekly or monthly grouping — that's how you see whether a poster keeps pulling or only worked in its first week.
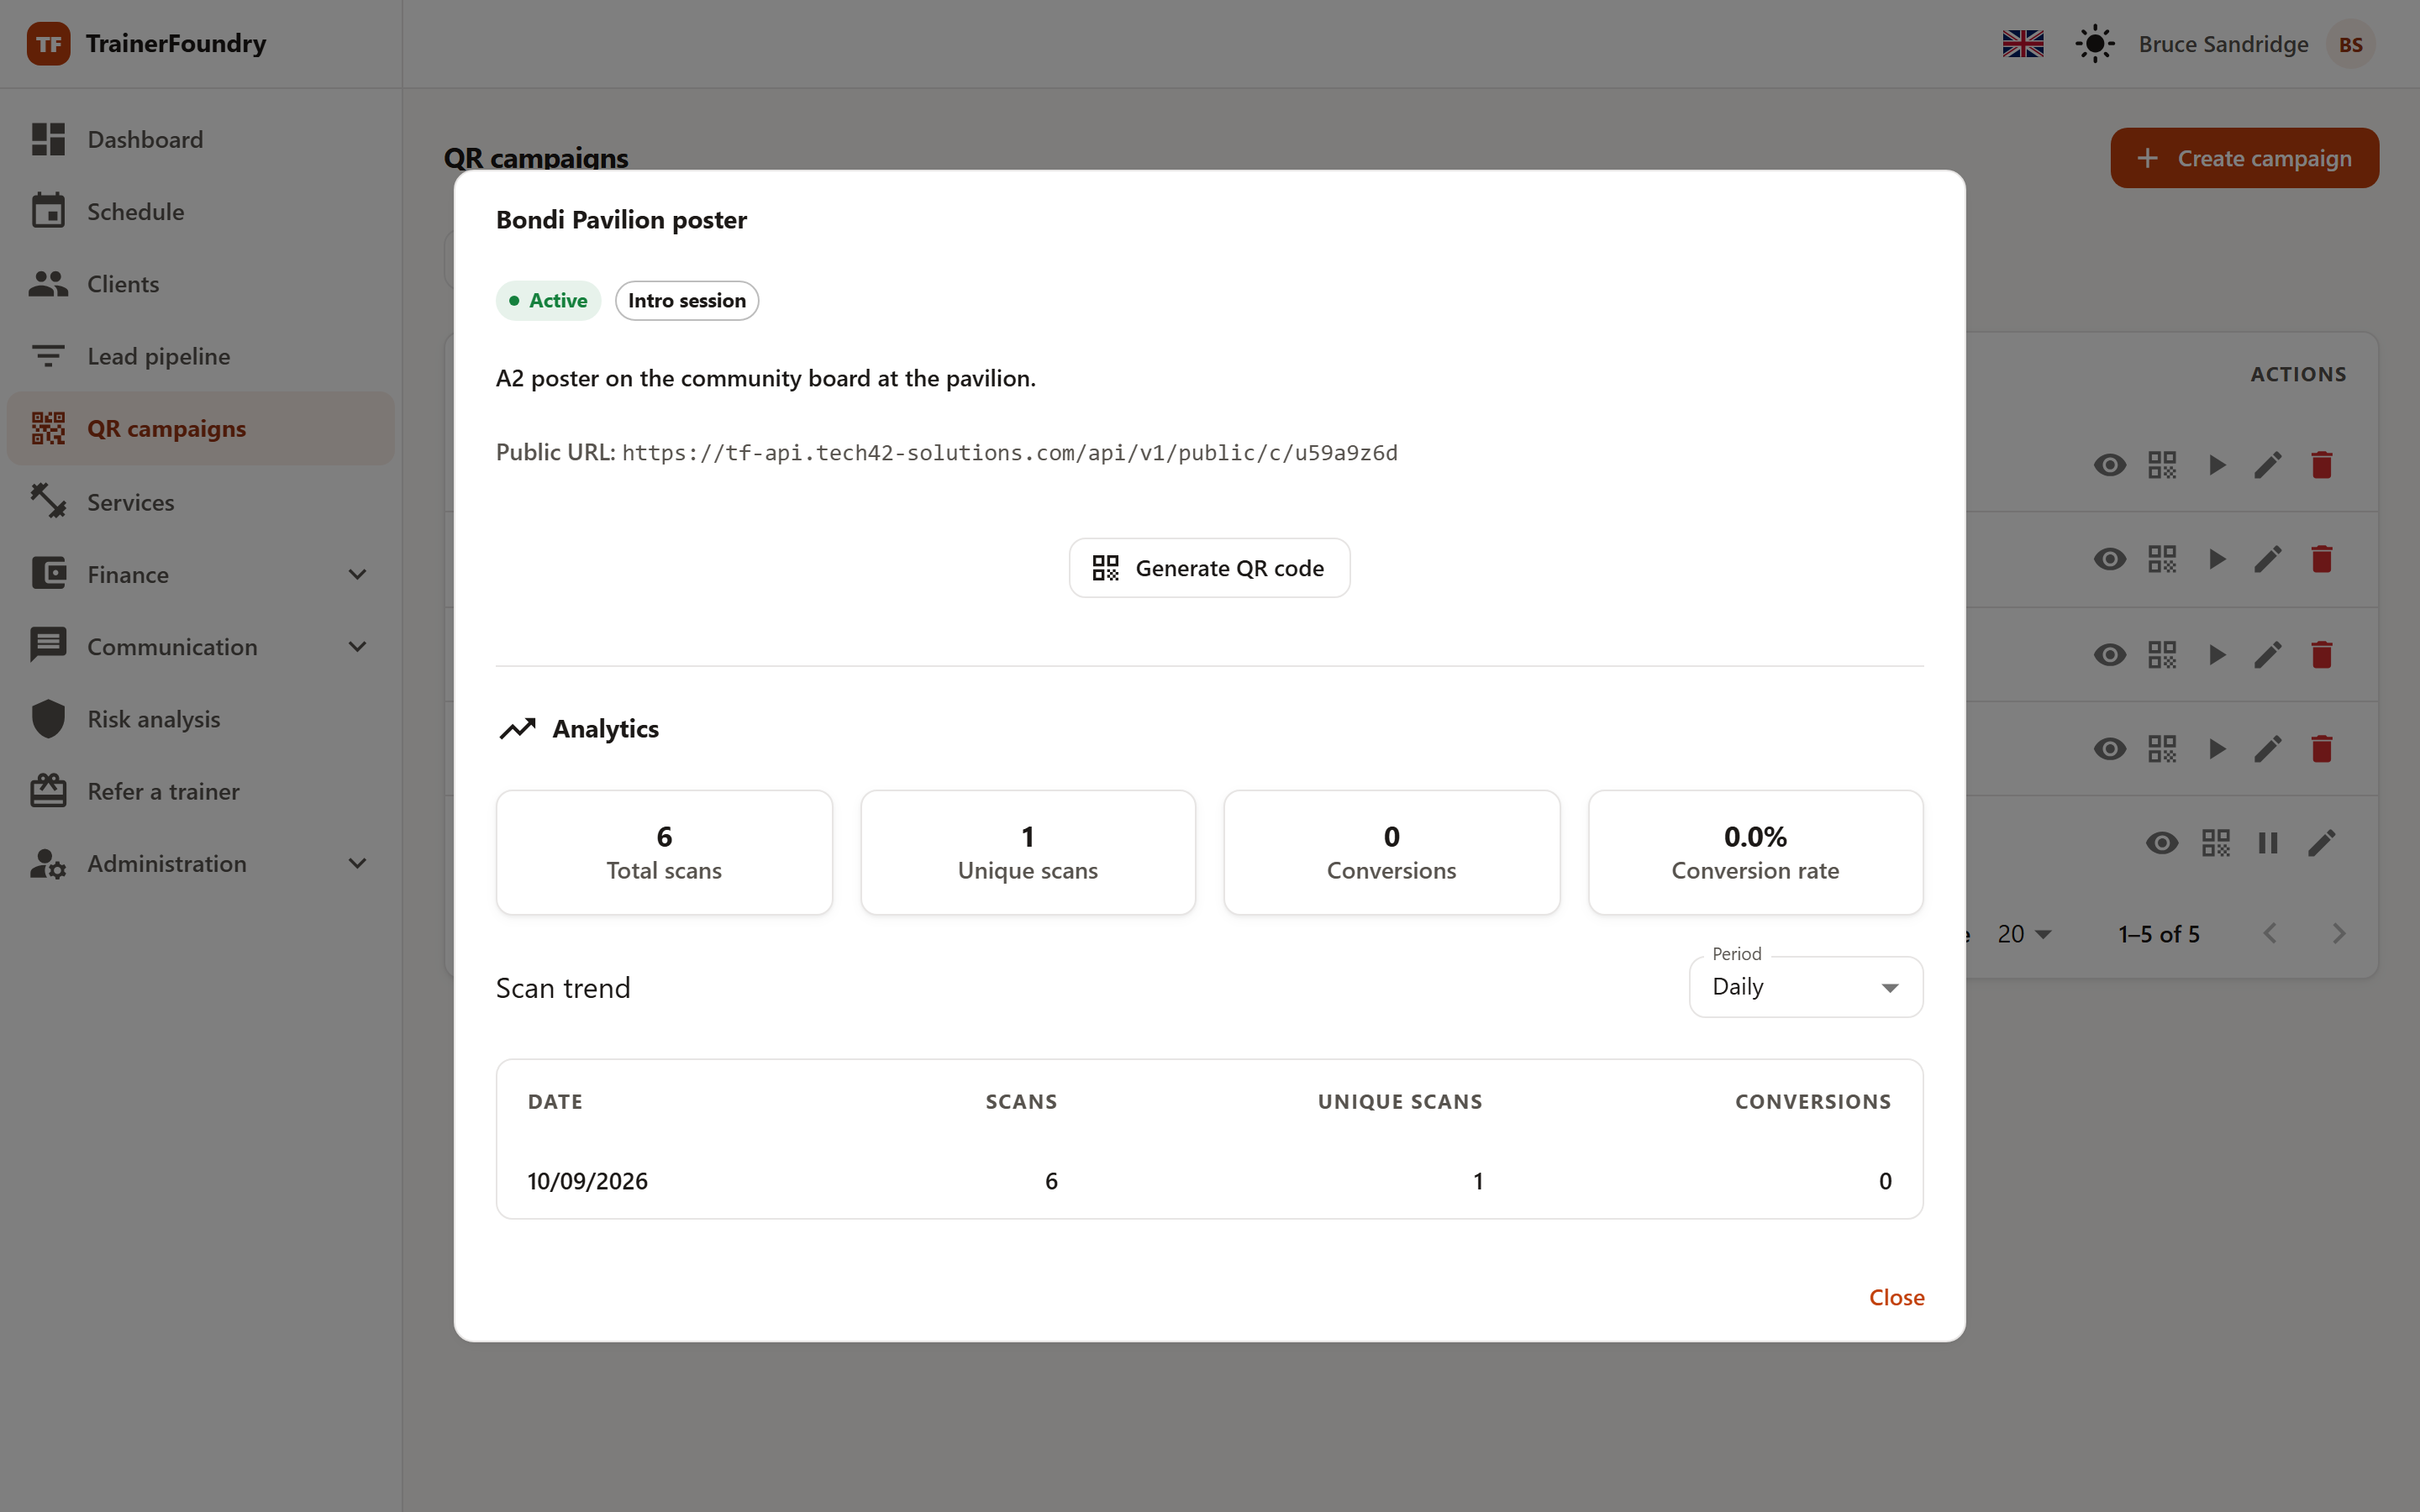
A note on the Conversions and Conversion rate figures: a conversion counts once a scan actually turns into a captured lead (only the Intro session type creates leads inside TrainerFoundry directly — for the other two types you're only redirecting, so that figure stays at zero there). It's still worth looking past the number to the leads themselves: every card and detail view in your lead pipeline shows its source — the pipeline itself can't be filtered by it, though, only searched by free text. For a lead that came through a code, the detail view also carries a chip with the campaign's own name, so that's where you actually see which campaign it was. The notification email you get for every new lead does tell you it was a QR scan at all — it just doesn't name the campaign, only an internal id.
A practical rule of thumb: one code per spot. A single code across every piece of material is less setup, but it costs you the one question you actually wanted answered — which spot brings people in.